Posts

Week 8: Last week

Image
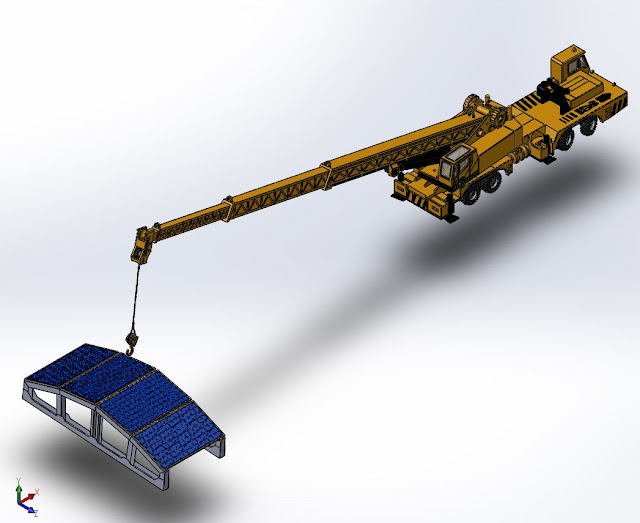
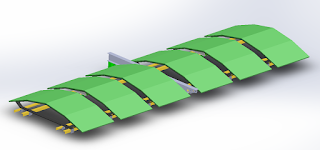
The solar team was working on demonstrating the loading process of the solar module and mount with animation but couldn't complete it. We attempted to use SolidWorks to show the mounting process as it was important to show for future solar teams. Another thing the solar team worked on was writing our final report. We gathered all the research and final design to compile for future teams. We uploaded all the CAD files as well as our report on to the Spartan Superway archive.

Week 7 - Solar Racking System Design Continued

Image
This week we continued working on multipe racking system designs. Different ideas for mounting the vertical panels will continue to be tested in the near future. The racking system above allows for three solar panels to be mounted in a row using L-Brackets and T-Brackets connected to the main strutcure. The beam at the center of the rack allows for the two trusses to be connected. It also allows for solar panels to be mounted on the top and clamped on eventually. 

Week 6 - Solar Racking System Design

Image
Week 6: Shorter week This week, we worked on designing different solar mounts for the side panels and improving the structural integrity of our truss designs. Claude mentioned the side cover might also have a curved solar panel and we are working on trying to come up with a design that satisfies that need. Below in Figure 1, one of those designs was created with a side mount. This is still a work in progress and needs more work and will eventually be modified to fit more panels on the side and the top. More sheet metal is still required to make it work. Figure 1. Side mount solar panel. 

Week 5 - Learning Sheet Metal, New Design Structures, System Production Analysis

This week we learned how to use sheet metal in SolidWorks. In addition, we analyzed the system production of a solar system that was 2000 m long and 4 panels across. We then compared our results to determine if these results to determine how close they were to an excel spreadsheet setup. It was determined that the results were close enough. The differences are due to different input panels and inverters, as well as other setup parameters. Also, We worked on new designs that would be more visually pleasing to riders, such as arched sheet metal on the side instead of previously proposed flat panels. The top could remain the same as previous designs we have proposed in week 3.

Week 4: Solar Panel Mount Design

Solar Team: Panel Mount Design This week, the solar team worked on coming up with different designs for the solar panel mount. Each member created different designs. The designs were created to follow the following Targets: not drilling into the L-beam, using only sheet metal and aesthetically pleasing. We presented our designs on thursday to the whole Spartan Superway and based on the feedback we got, we have started making improvements to our design. Claude has also shared new files with us, that shows us what kind of designs we should be thinking about.  

Week 3 - Solar Panel Designs

Image
For week 3, we began creating designs for solar panel mounts. These mounts will go on top of our tracks and will meet the following goals: Curved array Easy to access Cover side of tracks We achieved the first two goals by creating a solar panel array that starts at a 10 degree descent with the inner panels and drops to a 20 degree descent with the outer ones. We mounted them to the L beams by using L brackets that will go above and below the beam, allowing us to slide the panels back and forth on the track. We also created a special rack that connect the panels to the brackets, however we will be looking into better methods of creating them. The time and cost of manufacturing them is not desired when compared to other methods such as sheet metal. Figure 1: Completed first design

Week 2 - Solar Team

Image
Week 2: Nahom: We worked on finding the energy per pod. It took 3.68 M Joules of energy to move a pod 4.8 minutes with an average power of 12.786 kilo Watt. We also worked on side track designs. One design idea was covering the side tracks with ads or information board/screen and the other design was to use solar panels.  We learned how to design using sketchup and used JPODs sketchup design to make the side track cover. Colin: For this second week, I began working up designs for our solar panel array and mounting system. Our goal is to bring a curved aesthetic with ease of accessibility. To do this, I created a 5x25 array in a curved design going from 10 degrees to 30 degrees. I also designed a mounting system that uses posts on one side for the PVs to slide into, so that it can be supported by just a single screw on the opposite side. This will allow for easy access and quick swapping from below if needed. I will continue to work on more designs and hopefully we can come up wit